Chapter 2 Running Code
The first thing you need to do with any new language is figure out how to get some code running. In this chapter we’ll create a simple hello world program and run it in Swift. We’ll go through multiple ways of running a program: interactively at the REPL, interactively using playgrounds, and as a standalone executable program (using both Xcode and the swiftc command).
2.1 Prerequisites
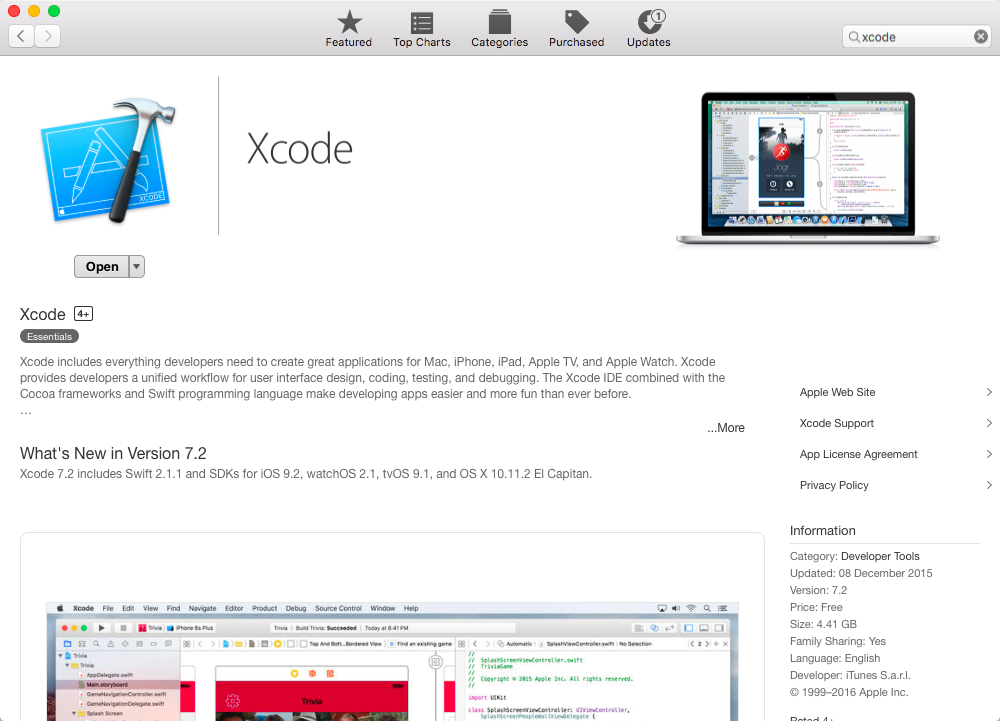
To get started you’ll need to have the latest version of Xcode installed (At the time of writing the latest version is 6.1). You can install Xcode through the Mac App Store (See Figure 2.1). To install it open up the app store, search for Xcode, and then install it. It’s quite a large download so you may want to start the install now and go get a cup of tea.
2.2 The REPL
A REPL is a read-eval-print-loop, and is a way of interactively running and inspecting code. If you’ve come from a dynamic language such as Ruby, Python or Clojure the REPL probably forms an important part of your development workflow. You’ll often use it to try out libraries, debug existing code and inspect what’s going on in your program.
Swift also has a REPL, although you’ll find it quite a bit different to the REPL you’re used to (For playing around with Swift code, playgrounds - covered in section 2.4- are more analogous to the interactive REPL that you get with other languages and are probably a better way to experiment with Swift code). If you’ve installed the latest version of Xcode you should have a swift command available in your terminal, which launches a Swift REPL1.
You can run the Swift REPL from the command line and enter Swift code directly into it.
$ swift
Welcome to Swift!  Type :help for assistance.
  1> println("Hello world")
Hello world
  2> :quit
Whenever you enter valid Swift code in the REPL, it will immediately compile and run it.
Lets play around with the Swift REPL a bit.
$ swift
Welcome to Swift!  Type :help for assistance.
  1> 3.14 * 2.5 * 2.5
$R0: Double = 19.625
  2> println("The area of the circle is \($R0)")
The area of the circle is 19.625
  3>
  4> $R0 * 2
$R1: Double = 39.25
  5> println("And double that is \($R1)")
And double that is 39.25
  6>
You can access previous lines that you’ve entered using $R0 etc. Each result in the REPL gets assigned to a $RN variable so you can later refer back to that result.
You can enter multi-line code and the REPL won’t evaluate it until the code block is finished.
$ swift
Welcome to Swift!  Type :help for assistance.
  1> 3.14 * 2.5 *
  2. 2.5
$R0: Double = 19.625
  3>
If we make a mistake when we enter our multi-line code, then we can edit the multiple lines as a single block. Here we enter a function to double an integer that’s given as an argument, but we incorrectly declare the return type (we’ll get to functions later, but for now just focus on the ability to correct multiple lines at once.)
$ swift
Welcome to Swift!  Type :help for assistance.
  1> func doubler(num:int) -> int {
  2.     return(num * 2)
  3. }
repl.swift:1:26: error: use of undeclared type 'int'
func doubler(num:int) -> int {
                         ^~~

  1>
This function raises an error because we typed int instead of Int. So the REPL drops us back to line 1, and when we press the up arrow, we can edit all 3 lines at once and fix our error.
So if we press the up arrow, we can correct our code, then move to the end of line 3 and press return to have the code evaluated again.
  1> func doubler(num:Int) -> Int {
  2.     return(num * 2)
  3. }
  4>
  5> doubler(4)
$R0: (Int) = 8
  6>
2.3 Creating an Executable
Swift code is compiled into machine code. Thus your compiled Swift program can be run as a standalone program - A user doesn’t need to have Swift or Xcode installed to run your compiled Swift program.2
We can compile our Swift code into an executable binary using the swiftc command (but for larger projects you’re probably better off creating a project in Xcode and using that to compile a binary).
Lets put our hello world program into a file called hello.swift
println("Hello world")
Now we can use the swiftc command to compile this file into an executable. Running swiftc hello.swift creates an executable called hello which we can directly run from the command line.
$ swiftc hello.swift
$ ./hello
Hello world
2.3.1 Creating an Xcode project
Next we’ll use Xcode to create a simple hello world program.
For more complex apps we can create an Xcode project and use that to manage all the project dependencies and compile our resulting application. For example, Xcode has project templates for command-line applications, OS X Cocoa applications, iOS applications etc.
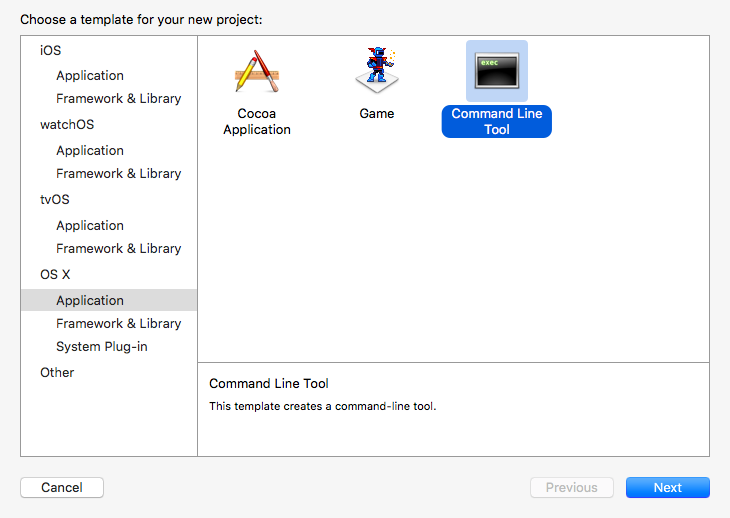
To create a new project, launch Xcode and select ‘Create a new Xcode project’. Or, if you already have Xcode open go to File -> New -> Project. For this example we’ll create a new Command Line Tool (Figure 2.2).
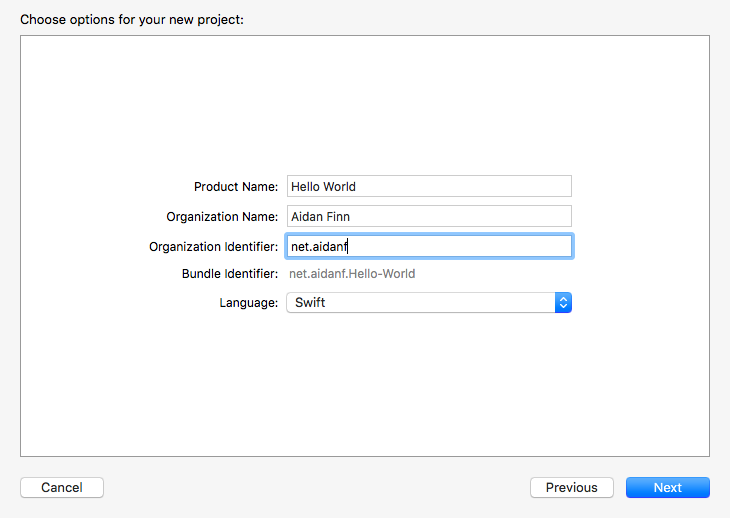
Next we fill out some details for our new project (figure 2.3):
- Product Name: The name of our project (this is the name that will show up in the App Store if you end up submitting it).
- Organization Name: Usually your name or the name of your company.
- Organization Identifier: A unique identifier for your company. The convention here is to use your domain name with the parts reversed.
- Bundle Identifier: This is auto-generated here from your product name and organization name. It’s a unique id that will identify your app in the apple ecosystem.
- Language: Make sure you select Swift here!
Next choose a location to save your new project. Once you’ve done that your new project will be created and you’ll be looking at it in Xcode (figure 2.4).
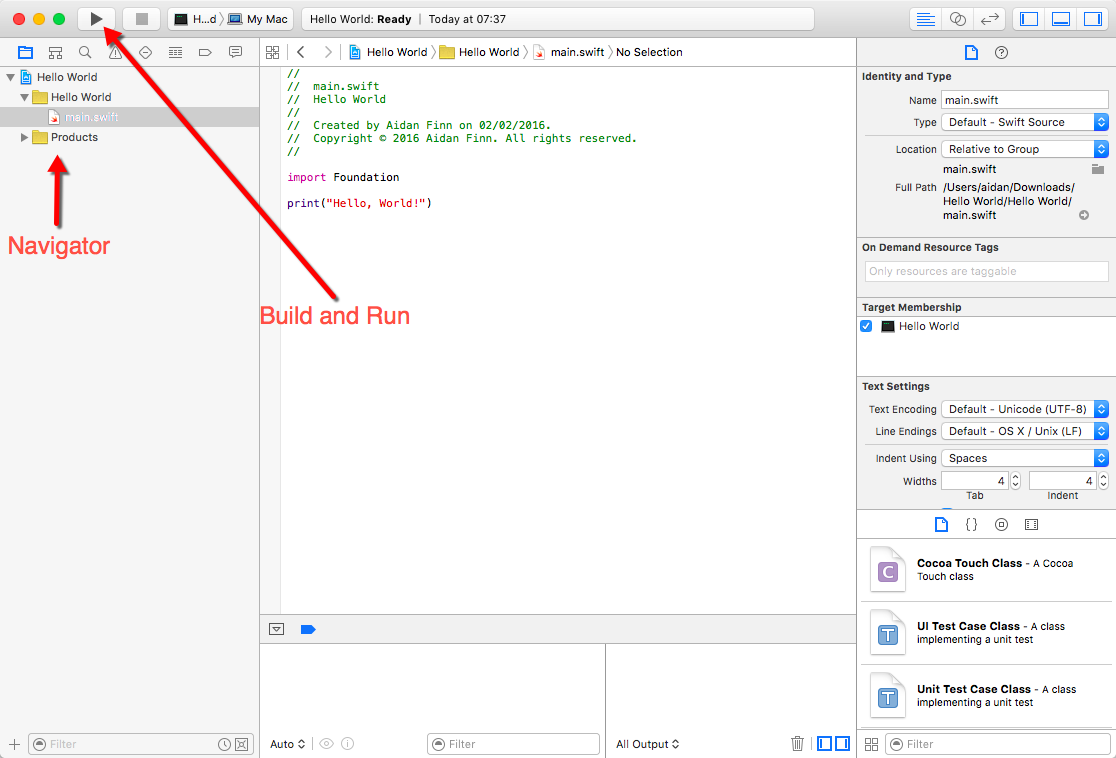
The default new project has a single Swift file called main.swift, which by default is already a program that prints “Hello, World!”
import Foundation

println("Hello, World!")
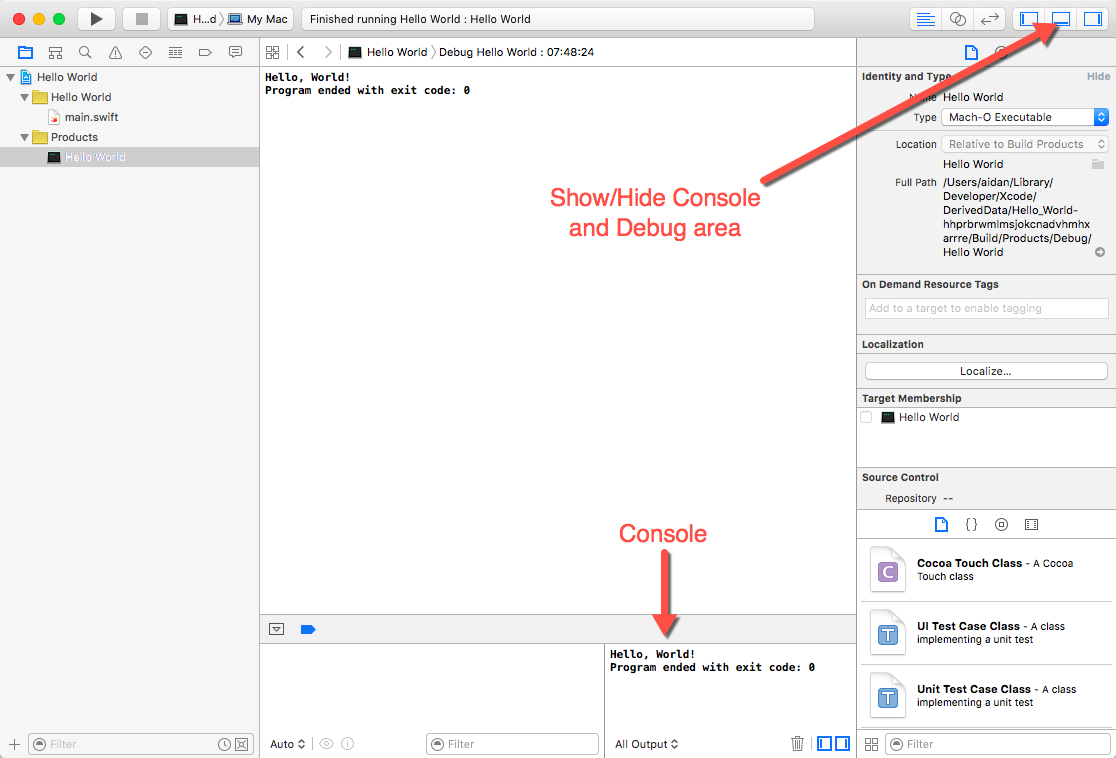
There’s a lot of stuff going on in the Xcode interface here (Figure 2.4). It can be a lot to take in and it can be tricky to figure out what all the different parts of the UI are for. For now just focus on the parts that we need to execute our hello world program. Ignore everything else for now.
In the left hand pane (called the navigator - you can show and hide this using ⌘-0. You can also use ⌘-1 to ⌘-8 to navigate through various navigator views) we see our project details. If we expand the Hello World folder we see that it contains a single file main.swift.
Next we’ll compile and run our project. We can do this by clicking the build and run button (See figure 2.4). When we run this we see a notification that the build succeeded.
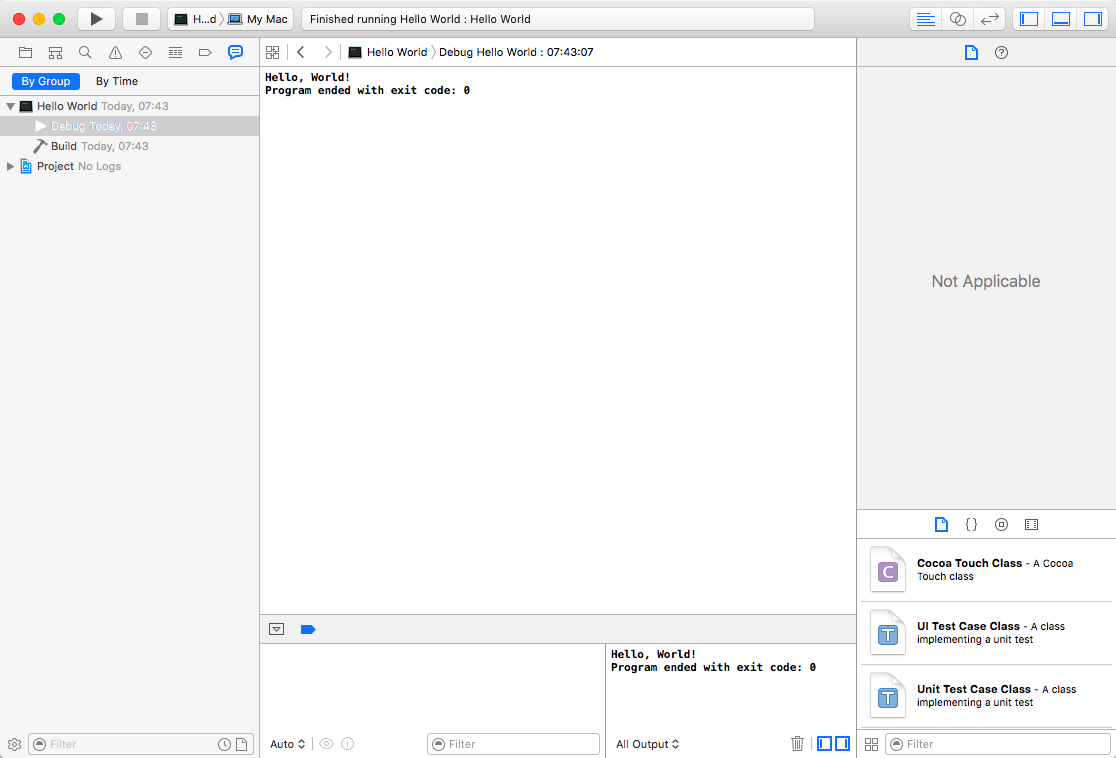
If you click ⌘-8 you’ll see the report navigator and you can click on the most recent debug item to view its output (Figure 2.5).
Click ⌘-1 to get back to our original view. If you expand the products folder, you’ll see the Hello World executable that was generated. If you right click on this and select ‘Show in finder’ we can see the generated executable (Figure 2.6).
We can see the output of our program in the console window. Or once we know the full path to it we can call it directly using the command line.
2.4 Playgrounds
The easiest way to run Swift code is using playgrounds. Playgrounds let you interactively explore Swift code, and see it being evaluated as you enter it. They are a great way to explore Swift and for most of this tutorial we’ll use playgrounds to run our Swift code.
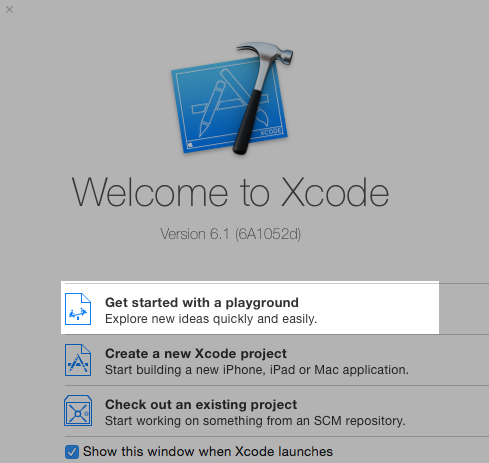
To create a new playground, launch Xcode and click “Get started with a playground”. Enter a name for your playground and then save it.
| Video: Running Swift with playgrounds |
| This video show how to run some code in a playground and use the timeline view to inspect the value of a variable over time. |
| Video: Running Swift with playgrounds |
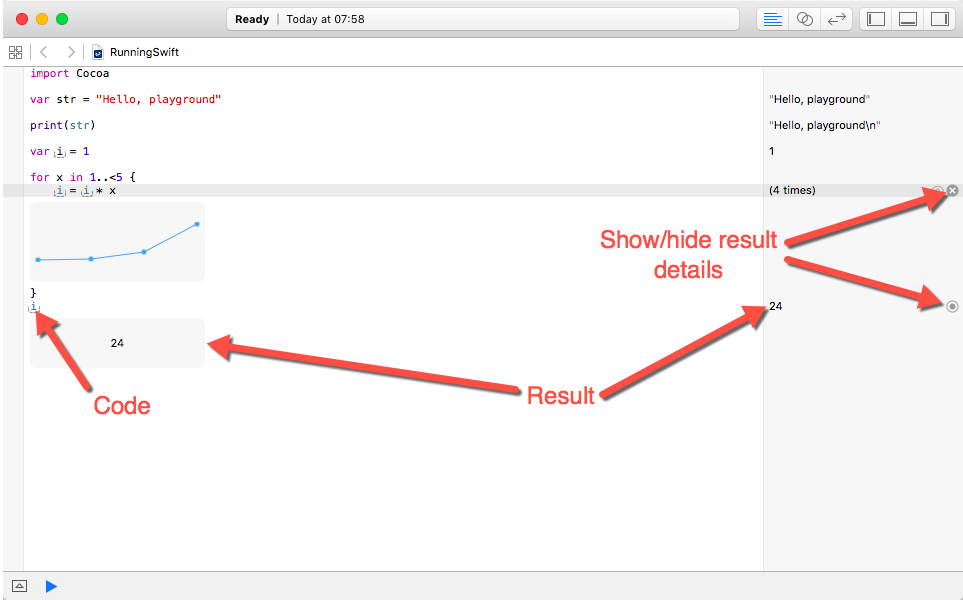
Figure 2.8 shows what a playground looks like. One the left pane you enter your Swift code. The right pane shows the result of evaluating each line of code. Whenever you enter a line in the playground, Xcode will evaluate every line in the playground, and print the result of each of these lines in the corresponding line in the right hand pane. This makes playgrounds an excellent way of getting immediate feedback on how various bits of code work. You can just put your code in a playground and get immediate feedback on the results.
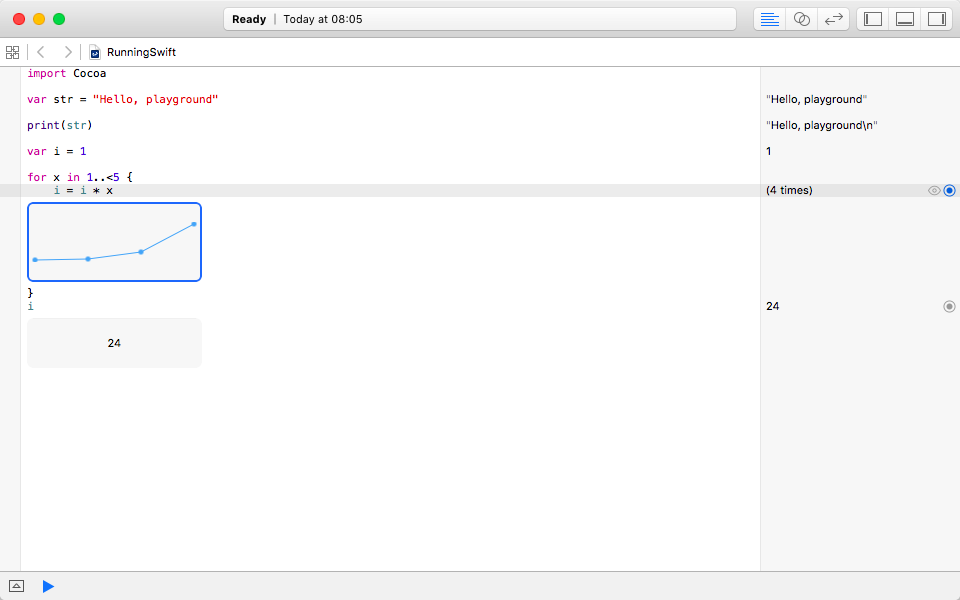
The timeline view lets you examine the value of a variable over time. Figure 2.9 shows the timeline for a loop that modifies the value of i.
As you go through the following chapters, I strongly encourage you to create a playground for each chapter and enter each line of code in it and check the results. You can then play around with the various features of Swift to get comfortable and explores methods that I haven’t mentioned here using Xcode’s auto-complete.
2.5 Summary
In this chapter we introduce you to various ways to run Swift code. The different ways we covered were:
- Running code interactively using the REPL
- Compiling an executable using the
swiftccommand - Creating an Xcode project and using it to create a command line program.
- Running code interactively using playgrounds
For the most part we’ll use playgrounds for executing Swift code. We’re interested in learning the language and not getting bogged down in the details of learning to use Xcode along with the overhead of managing a project in Xcode. So for most of the chapters looking at Swift language features, we’ll use playgrounds to play around with whatever language feature we’re discussing.
- If the swift command isn’t available (e.g. you are running an older version of Xcode or the swift command wasn’t setup correctly for some reason) you may need to run it using
xcrun swift. ↑ - This is significantly different from languages like Ruby and Python. Those languages compile into byte-code which is executed by an interpreter. For example, for a user to run a Ruby program, they must have a Ruby interpreter installed on their machine. There are options available that allow you to bundle a Ruby program into a single executable, but they work by bundling your code with a Ruby interpreter and packaging them together into an executable. Swift on the other hand is compiled into a native binary that can be run as a standalone executable. ↑